Have you ever spent hours crafting the perfect long-form content in Sanity Studio, only to discover that your carefully structured blog posts lack the navigation tools readers expect? Without a table of contents, readers often struggle to navigate lengthy articles, leading to higher bounce rates and reduced engagement with your content.
Unlike platforms such as WordPress or Notion that offer built-in table of contents functionality, Sanity CMS requires a custom implementation to extract headings from Portable Text content and create an interactive navigation component. This apparent limitation actually becomes a strength, allowing you to build a TOC experience perfectly tailored to your content strategy and design system.
When you create a new blog post with multiple H2 headings after an introduction, you rightfully expect readers to easily jump between sections. However, without proper navigation aids, even well-structured content can feel overwhelming and difficult to consume.
This comprehensive tutorial will transform your Sanity-powered blog from a basic content display into an engaging, navigable experience that keeps readers engaged throughout your entire article. You'll learn to automatically extract headings from Portable Text, implement smooth scrolling navigation, and add visual indicators for the currently active section.
How to Automatically Add a Table of Contents to Your Sanity CMS Blog: A Step-by-Step Guide - ContentWrap
Extract H2 headings automatically from Sanity Portable Text content
Create an interactive, sticky table of contents component
Implement active section tracking with Intersection Observer API
Add smooth scrolling navigation between content sections
Style the TOC with responsive design and accessibility features
Handle edge cases and special characters in heading generation
Prerequisites:
Basic knowledge of React and Next.js
Existing Sanity CMS blog setup
Familiarity with Portable Text rendering
Understanding of CSS/Tailwind for styling
Understanding the Problem
Sanity's Portable Text provides incredible flexibility for rich content creation, but this flexibility comes with the challenge of extracting structured information for navigation purposes. Unlike traditional HTML where you can simply query for heading elements, Portable Text stores content as an array of block objects with style properties.
The core challenge lies in bridging the gap between Sanity's structured content format and the DOM elements that readers interact with. We need to:
Extract heading information from Portable Text blocks during the query phase
Generate consistent identifiers that work across both the TOC and rendered content
Maintain synchronization between the navigation and visible content sections
Handle accessibility requirements for keyboard navigation and screen readers
Our solution must traverse this structure, extract meaningful heading text, and create a seamless connection between the table of contents and the rendered HTML elements.
Solution Overview
Our table of contents implementation consists of three interconnected components working together to create a seamless navigation experience:
1. Data Extraction Layer We'll modify our Sanity queries to extract heading information using GROQ's powerful filtering capabilities. The query content[style == "h2"].children[0].text efficiently extracts all H2 heading text during the initial data fetch.
2. Component Architecture
TableOfContents Component: Handles navigation rendering, active state tracking, and user interactions
Modified PortableText Component: Generates consistent heading IDs and renders content with proper anchor points
Page Layout Integration: Positions the TOC appropriately and manages responsive behavior
3. Interactive Features
Intersection Observer API: Tracks which section is currently visible and updates the active state
Smooth Scrolling: Provides polished navigation between sections
Responsive Design: Adapts the TOC display based on screen size and content length
This approach ensures that your table of contents remains synchronized with your content while providing an optimal user experience across all devices.
Schema Setup and Query Modification
Before implementing the frontend components, we need to modify our Sanity queries to extract heading information efficiently. This approach is more performant than parsing Portable Text on the client side.
Basic Blog Schema Structure
First, ensure your blog schema includes a content field that uses Portable Text:
The key addition is the "headings" field, which uses GROQ's filtering syntax to extract text from all blocks with style == "h2". This query specifically targets the first child's text content, which contains the heading text in Portable Text's structure.
Advanced Query for Multiple Heading Levels
If you want to support multiple heading levels (H2, H3, H4), you can create a more sophisticated query:
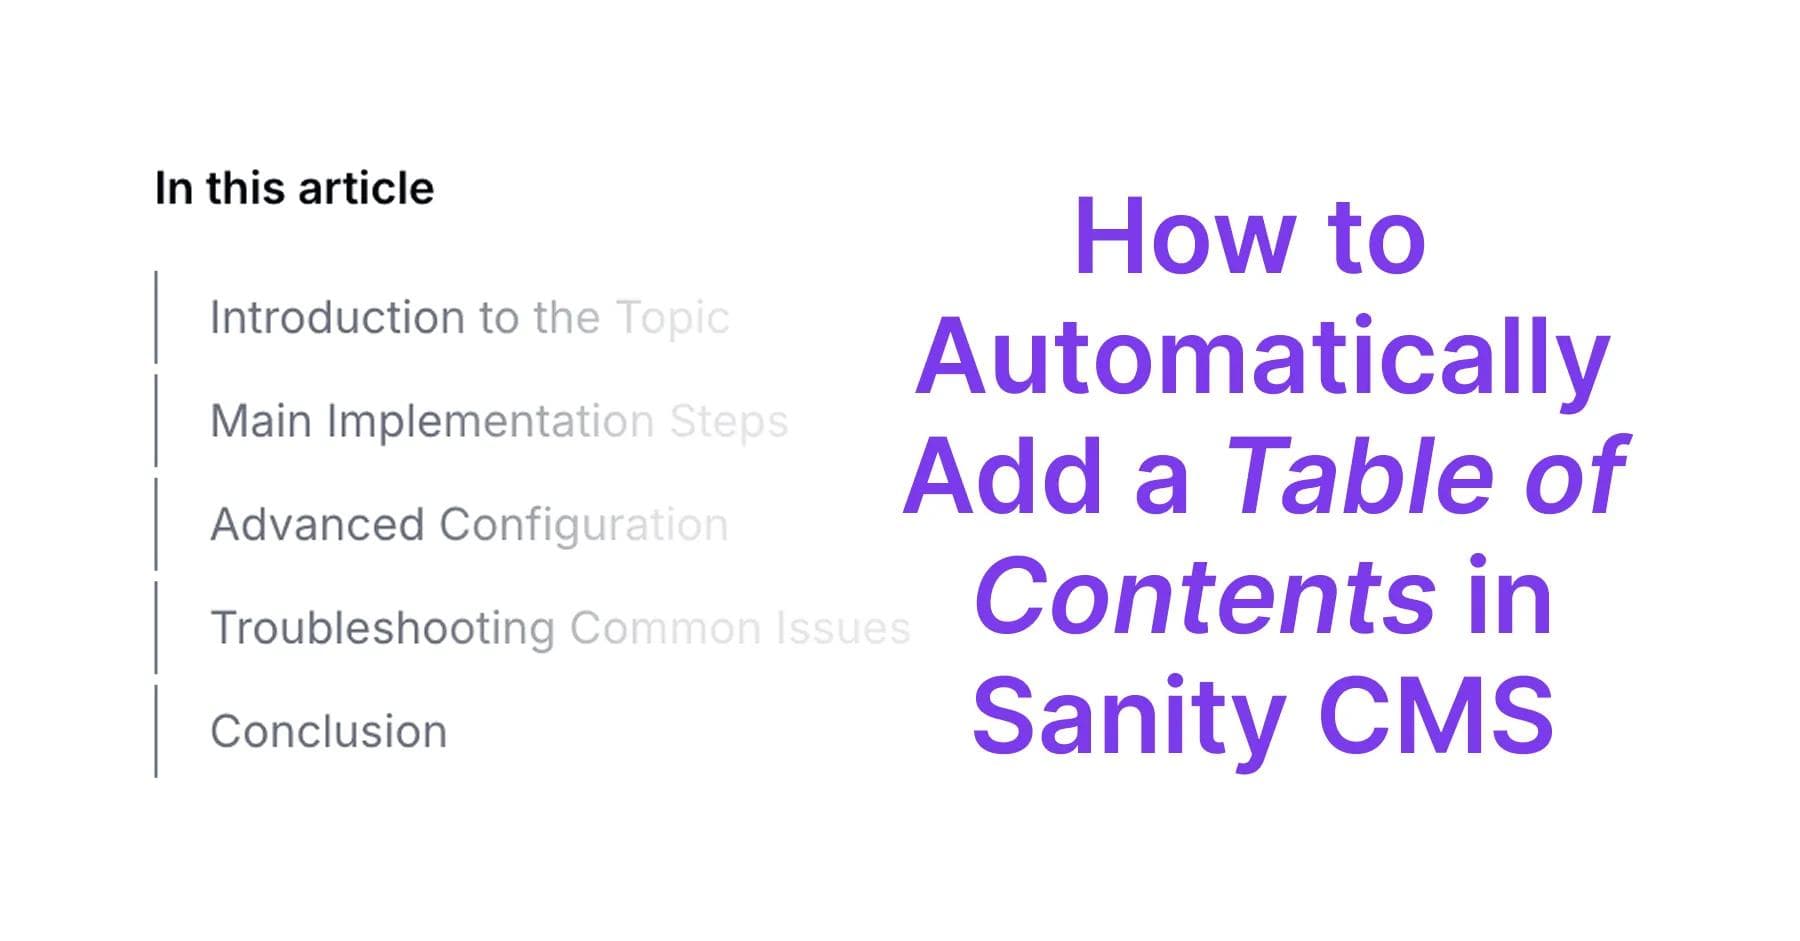
{ "title": "Your Blog Post Title", "headings": [ "Introduction to the Topic", "Main Implementation Steps", "Advanced Configuration", "Troubleshooting Common Issues" ]}
Creating the TableOfContents Component
Now we'll build the interactive table of contents component that handles navigation, active state tracking, and user interactions.
Ready to Budget for Sanity?
ContentWrap helps companies save thousands on their Sanity bills through smart caching strategies and optimized API usage.
The PortableText component needs to generate consistent heading IDs that match those used in the TableOfContents component. This ensures proper synchronization between navigation and content.
Enhanced PortableText Component
Update your existing PortableText component to include heading ID generation:
Consistent Slug Generation: We use the same slugify configuration ({ lower: true, strict: true }) in both components to ensure IDs match perfectly.
Conditional ID Generation: The includeTableOfContents prop controls whether heading IDs are generated, allowing you to use the same component for content that doesn't need TOC functionality.
Accessibility Considerations: The heading structure maintains proper semantic hierarchy (h1 → h2 → h3) which is crucial for screen readers and SEO.
toPlainText Utility: This Portable Text utility extracts clean text from complex block structures, handling nested formatting and special characters.
Handling Edge Cases
The implementation handles several edge cases automatically:
Examples of headings that are properly handled:"Getting Started" → "getting-started""API & Integration" → "api-integration" "Step 1: Setup" → "step-1-setup""What's Next?" → "whats-next"
The strict: true option in slugify removes special characters and ensures URL-safe IDs, while lower: true maintains consistency.
Implementing Page Layout Integration
Now we'll integrate the TableOfContents component into your blog post page layout, ensuring proper responsive behavior and visual hierarchy.
Blog Post Page Layout
Create or update your blog post page to include the table of contents:
Congratulations! You've successfully implemented a comprehensive, interactive table of contents system for your Sanity CMS blog. This implementation provides your readers with intuitive navigation tools while maintaining excellent performance and accessibility standards.
What You've Accomplished
Your table of contents implementation now includes:
Automatic heading extraction from Sanity Portable Text using efficient GROQ queries
Interactive navigation with smooth scrolling and active section highlighting
Responsive design that adapts elegantly across desktop and mobile devices
Accessibility features including proper ARIA labels and keyboard navigation support
Performance optimizations using Intersection Observer API for efficient scroll tracking
Robust error handling for edge cases and special characters in headings
Measuring Success
To evaluate the impact of your TOC implementation, monitor these key metrics:
Time on page: Well-navigated content typically sees 20-30% increases in engagement time
Scroll depth: Track how far users scroll through your long-form content
Bounce rate: Improved navigation often reduces bounce rates for blog posts
User feedback: Collect qualitative feedback about content discoverability
Future Enhancements
Consider these advanced features for your next iteration:
Enhanced User Experience:
Add estimated reading time for each section
Implement collapsible subsections for H3 and H4 headings
Include a "jump to top" button for long articles
Add keyboard shortcuts for power users (J/K for next/previous section)
Content Intelligence:
Integrate with analytics to show popular sections
Add related article suggestions based on current section
Implement search functionality within the TOC
Use AI to generate automatic section summaries
Advanced Customization:
Create different TOC layouts for different content types (tutorials vs. guides vs. news)
Add customizable depth levels (H2 only vs. H2-H4)
Implement user preferences for TOC positioning and behavior
Support for custom TOC styling per article or author
Integration Opportunities:
Connect with commenting systems to show discussion activity per section
Integrate with social sharing to share specific sections
Add print-friendly TOC formatting
Create email newsletter templates that include section summaries
Best Practices for Content Creation
Now that you have a robust TOC system, optimize your content creation workflow:
Content Structure Guidelines:
Aim for 3-8 main sections (H2 headings) per article
Keep heading text concise but descriptive (4-8 words ideal)
Use parallel structure in heading naming (all questions, all actions, etc.)
Ensure logical flow between sections for readers who jump around
SEO Benefits:
Your TOC headings now serve as featured snippet opportunities
Search engines can better understand your content structure
Internal linking becomes more natural and effective
Reader engagement signals improve search rankings
Resources for Continued Learning
To further enhance your Sanity CMS and content management skills:
Sanity Documentation: Explore advanced GROQ queries and Portable Text customizations at sanity.io/docs
Intersection Observer API: Deepen your understanding at MDN Web Docs
Web Accessibility Guidelines: Ensure your TOC meets WCAG standards at w3.org/WAI
Performance Optimization: Learn more about web performance at web.dev
Your readers will now enjoy a significantly improved content experience with clear navigation, better content discoverability, and professional-grade functionality that rivals the best content platforms available today.
Sanity Setup
Studio UX
Sanity
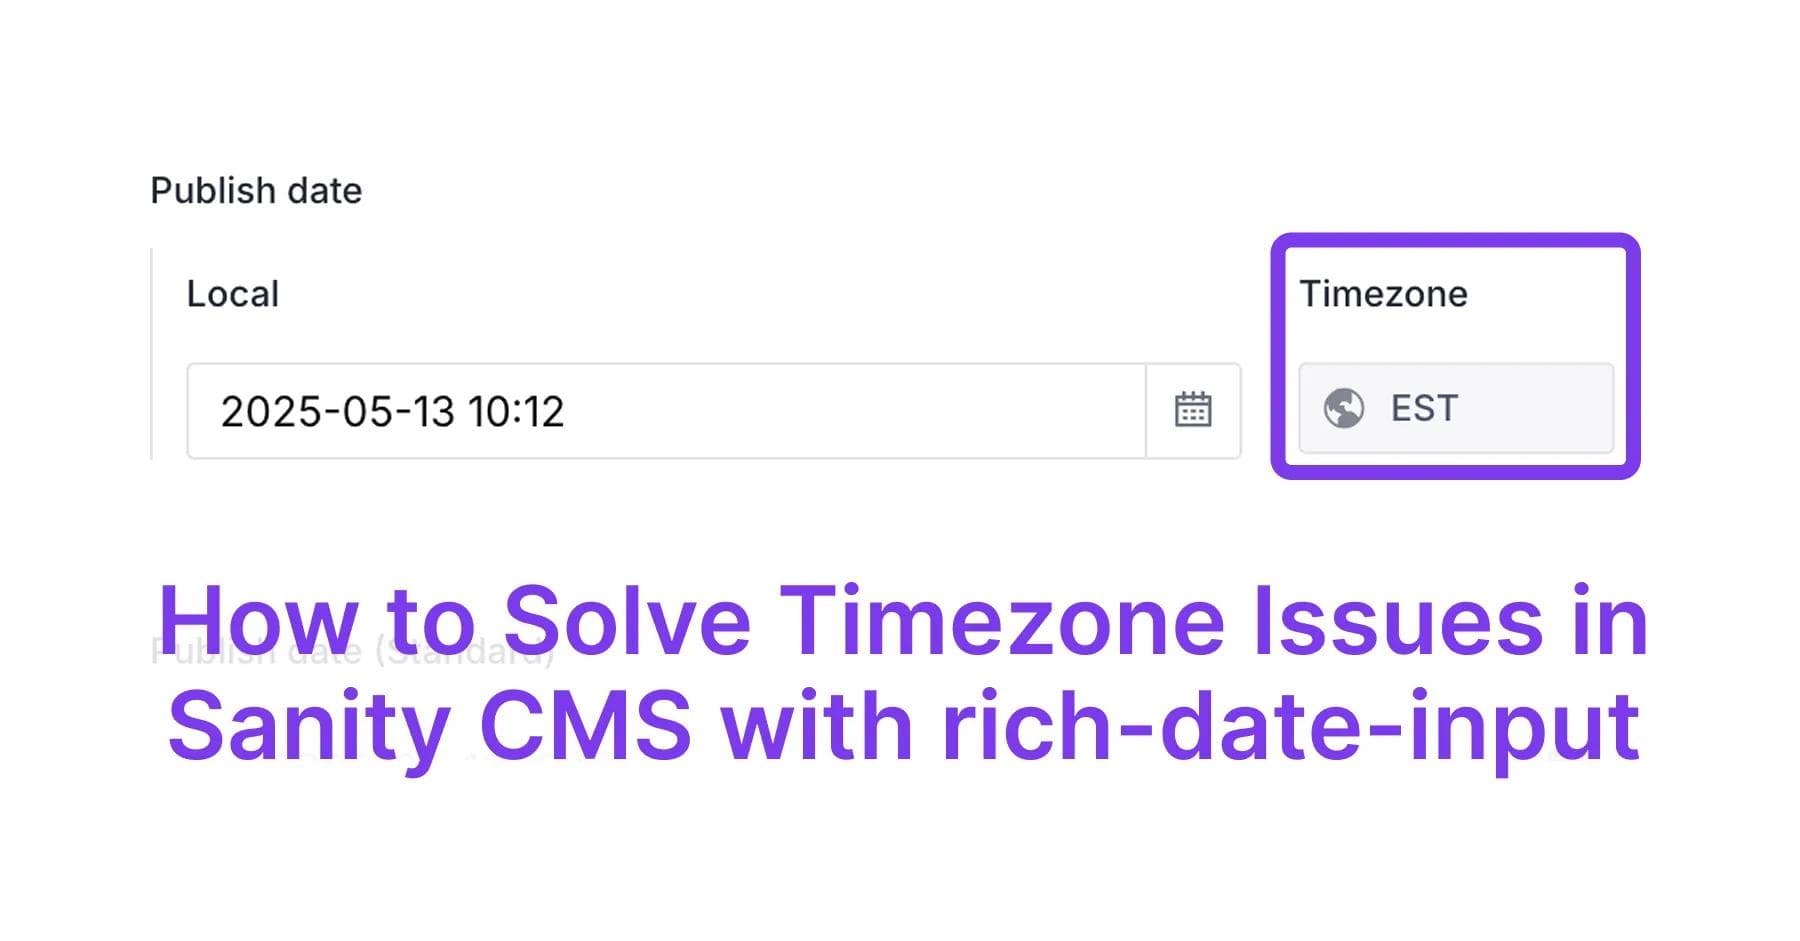
How to Solve Timezone Issues in Sanity CMS with rich-date-input: A Step-by-Step Guide
Eliminate timezone headaches in Sanity CMS with the rich-date-input plugin. Learn how to prevent publishing date confusion and ensure consistent datetime display for global teams with this simple yet powerful solution.